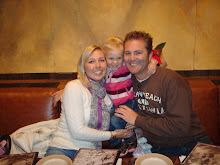
Well, our home computer crashed last week. I have no idea how many photos we lost. Dave said that Picasa was backed up a few months ago, so at least I know that our daughter's existence will be saved:) I have not had the energy to figure out how to get photos on without my program, nor have I been elbow deep in projects....Mothering and wifing have been my full-time jobs. It's amazing how much time a blog takes up, for me, that is.
So, the sad story is I have no idea when I will be back up and running. I don't plan to close down permanently....this may only be temporary.
So, thanks for visiting and leaving such wonderful and encouraging comments!!
Hopefully, I will "see" you soon!
Tuesday, November 10, 2009
Monday, November 2, 2009
Kitchen Before and After
I'm joining in on the par-tay over at Thrifty Decor Chic! I completely forgot about it so I am posting this late...should have done it last night, but falling asleep on the couch at 8 o'clock kind of got in the way of that:)
So, without further adieu....
The kitchen BEFORE:
I should mention, however, that I have no pictures of the before before of the cabinets. I painted them this green with an antiqued finish in 2005. Before that they were your standard tract home oak ugliness. The finished product was the result of FOUR coats of paint....primer, paint, antiquing glaze, and a clear coat. They WILL NOT be re-painted any time soon. Thankfully, they look fabulous with the AFTER kitchen.
We also tiled the floor in 2005. I am the resident grouter-extraordinaire. Oh, the roosters!For some reason I always ended up with too many colors....I wanted a more neutral, warm, rustic feel. This is what we came up with.
The kitchen AFTER:
We basically changed the counter tops and backsplash. We went with a maple butcher block that we were able to order through a local supplier, Charles McMurray Co. They sell wholesale only, but my dad was able to order for us with through his business. The tile on the backsplash is tumbled marble. I loved the way each piece had striations of color. We also added this "ledge", for lack of a better term, all the way around the kitchen. Just wanted some interest in the design.
We added a new farmhouse sink and this little cutie....
Yes, our sink is a mere two steps away from the stove, but why not add a pot faucet when you can?I decided to leave the butcher block unsealed so it would develop a rich patina over time. I just fix spots and spills with a little 220 sandpaper and apply mineral oil (for food safety) every so often.
I will leave this post at the photos and, if you are interested, I may post the breakdown of what we did later. We still need to get rid of the grody florescent lighting, but that another project for another year.... Thanks for stopping by! Please leave any questions or comments or contact me via email.
Also shared with Between Naps on the Porch....
Special thanks to Lori for taking some of these AFTER photos for me! For those of you visiting from Kimba's DIY Day, Dave did the tile work, counter tops, and installation of all appliances and sink and faucet. I painted the cabinets and grouted and gave my opinion:)
Subscribe to:
Comments (Atom)


